
Guide
How to show a patient their scan on an iPad during a consultation
To show a patient their scan on an iPad, import the study before the visit (disc folder, ZIP or link) into a DICOM viewer app such as Ossidex, then walk them through a few prepared views: the key slice with a measurement, an MPR plane or the dental panorama for orientation, and a 3D view for the overall picture. Everything stays on the device.
Before the consultation
- Import the study. Copy the disc folder to Files, save the ZIP, or paste the imaging centre’s link into Ossidex. Large studies are best imported ahead of time.
- Find the key images. Scroll to the slices that matter and set window/level so the structure is easy to see (for CT: a bone or soft-tissue preset).
- Prepare the views. For dental CBCT, trace the arch so the panorama and cross-sections are ready. For CT or MRI, set up MPR with the crosshair on the finding.
- Add measurements. Place a ruler or angle where it helps the explanation — for example bone height at a site, or the size of a structure.
During the conversation
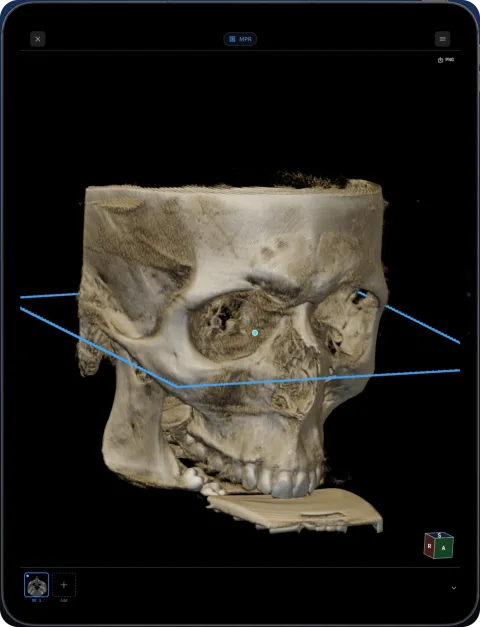
- Start with orientation. A 3D rendering or the dental panorama shows the whole region in a way patients recognise; then move to slices.
- One plane at a time. Explain axial (from above), then sagittal or coronal. Linked crosshairs show that each view is the same point.
- Let them look closely. Pinch to zoom on the iPad — easier than a monitor across the desk.
- Keep it neutral. The images support your explanation; the interpretation is yours as the clinician.
Which view for which question
| Question | Useful view in Ossidex |
|---|---|
| “Where exactly is it?” | MPR with linked crosshairs |
| “How much bone is there?” (dental) | Arch cross-sections with a ruler |
| “What does it look like overall?” | 3D volume with bones or teeth preset |
| “Has it changed?” | Two series side by side in a multi-panel layout |
| “Can I have a copy?” | PDF report or anonymized export |
MPR, 3D, the arch and multi-panel are Pro features on your own studies; 2D viewing and measurements are free.
Privacy
Scans are opened and processed on your iPhone or iPad. There is no account, and your images are not uploaded to Ossidex servers. If the patient wants a copy, export a PDF report (the patient name can be turned off) or an anonymized study.
A dental example: explaining a CBCT
A typical sequence for a CBCT consultation: start with the 3D view so the patient sees their jaw as a whole; switch to the arch and show the panorama, which looks like the X-rays they already know; then scrub along the panorama to the tooth or site in question and open its cross-section. A ruler on the cross-section turns “there is not much bone here” into a number the patient can see. Finish on the view you want them to remember and, if useful, export it as an image or a PDF.
A CT or MRI example
For a knee MRI or a sinus CT, open MPR with the crosshair on the structure you are discussing. Moving the crosshair in one plane moves it in the others, which helps patients understand that the three pictures are the same spot seen from different directions. For MRI with several sequences, put two series side by side with linked scrolling so you can show how the same structure looks in each.
Practical tips
- Turn on Do Not Disturb so notifications do not cover the image.
- Increase screen brightness; dark-grey anatomy is hard to see on a dim screen.
- Hold the iPad so the patient sees it upright, and let them pinch to zoom.
- Prepare the study in the library before the patient arrives — searching during the consultation breaks the conversation.
- For a larger audience (a family member, a colleague), mirror the iPad to a TV with AirPlay or a USB-C display adapter.
Sharing a copy with the patient
| Option | Contains | Good for |
|---|---|---|
| Image export | The current view with annotations | A single picture for messaging |
| PDF report | Key image and measurements; patient name optional | A tidy summary to print or email |
| Arch PDF (dental) | Panorama plus all cross-sections | Referral or second opinion |
| Anonymized export | The study without patient identifiers | Sending to a colleague |
Exports are free while the library holds up to five studies; after that they are part of Pro.
Frequently asked questions
Can I mirror the iPad to a TV or monitor?
Yes, with standard iPad screen mirroring (AirPlay or a USB-C display adapter) — Ossidex shows on the external screen like any app.
Does this work on iPhone?
Yes, but the iPad’s larger screen is much better for showing images to someone else.
Do I need internet during the consultation?
No. Once imported, studies open offline.
Related pages
Dentists
CBCT from any scanner at the chair: arch, cross-sections, MPR, 3D and TMJ MRI.
Dental panoramic arch and cross-sections from any CBCT
Trace the dental arch on a CBCT and get a live panorama with numbered cross-sections, tooth numbering, HU probe and a PDF report — on iPad and iPhone.
MPR and 3D volume rendering on iPhone and iPad
Multi-planar reconstruction with linked crosshairs, oblique planes and slab MIP, plus 3D volume rendering with presets and clipping, for CT, CBCT and MRI.
DICOM viewer without a computer: review CT and CBCT on an iPad
Can you review a CT or dental CBCT on an iPad instead of carrying a laptop? What works without a computer, how to get the files on the device, and the limits.